If you want to make an easy, beautiful, quick and inexpensive craft, it’s sure that DIY tissue paper flowers are what’s you’re looking for. It’s a nice hand made gift that you can customize easily. It’s also the perfect decoration for the majority of holidays and occasions as Valentine’s Day, birthday, weddings, baby showers, Cinco de mayo and much more. For the materials, they are cheap, easy to find and remember that kids particularly love this craft. So, how to make a tissue paper flowers?
1/ Materials:
To make tissue paper flowers, you will need:
Sheets of colored tissue paper (12″x6″ inch sheets or larger).
Sheets of cardstock or construction paper.
Pipe Cleaners or Flexible Wire.
Scissors.
A ruler.
A vase.
2/ Prepare the paper:
Take the tissue paper out, take 3 sheets and put each one on top of the other one. You have to line them up and cut into 12×6 inch sheets. If you need larger flowers, you can use bigger sheets and cut the size that you need. When you finish, once again make sure that your sheets are well lined up before you start folding the tissue paper. It’s better to start with the shorter side and make a one-inch fold to start off an accordion fold.
3/ Fold the Paper:
Put the tissue paper stack in front of your portrait style. Take the bottom edge and fold it over 1 inch. Now, flip it over and fold it back on the other side. Keep folding your way up the paper 1 inch at a time. When you finish folding, your tissue paper stack will look like an accordion.
4/ Use your scissors to Round the Edges:
With your scissors, cut both ends of the stacked tissue paper strip to have a rounded edge, so the tissue paper petals will have a rounded look.
5/ Add the Stem:
Add the Stem and fold the tissue strip in half, then place the pipe cleaner or chenille stem at the fold to be sure that the stem is well centered.
6/ Open the Layers:
Open up the tissue paper folds that you made slowly, starting on one side and be careful to pull apart the folds equally from both ends.
7/ Separate the Sheets:
Slowly, separate the tissue paper sheets to unfold the petals of the flower. Note that even if it doesn’t look awesome, it will still be good and your kids will like it so don’t bother.
8/ Add Leaves:
To have a realistic look, you need to add green leaves. Make two inches fold in a piece of green cardstock or construction paper as you want. Then, draw leaves on the folded edge. If you used 12×6 inch as the size of the tissue paper for the flower, the leaves should be at least four inches long and about one inch at their widest point.
Finally, cut out your leaves.
9/ Stick the leaves to Stems:
Place and stick where you want 1 or 2 leaves to the stem of each blossom.
10/ Arrange everything:
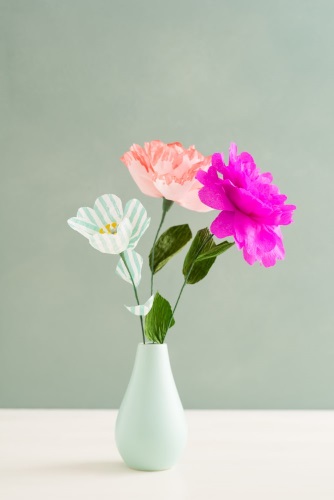
Finally, arrange this amazing art craft “tissue paper flowers” in a vase to look beautiful and keep or gift for a loved one especially your kids.
Related: Click here to check our other amazing tutorials.
Share: Don’t forget to share with your friends!


